This is part of a series of articles on level design and what goes into it. More specifically, level design as it pertains to single player (or coop) games, and not multiplayer competitive games (that’s a whole other topic). I’ll start with the basics of building a level out of discrete challenges, and move on to topics including teaching through level design, non-linear level design, verticality, and environmental storytelling. I will also break down levels from existing games to analyze what is going on from a design perspective.
This is a reprint from my old website. Unfortunately I have not yet figured out how to embed on the new website, so the interactive examples are currently unavailable.
Level Design Primer 6: Planning out levels
This article is going to be a bit different. I want to go a bit into my own personal process for planning out levels. Now, everyone is going to be different in what works for them as far as their own creative process is concerned, but I thought it might be useful to share my own.
First of all, I usually like to start on paper. The reason for this is it forces me to focus on large strokes first before getting caught up in minutia. I need to be able to describe each challenge, with a sentence or two and maybe a sketch. The key thing here is I need to demonstrate with those couple sentences (and possibly sketch) what purpose that challenge has and why it should be there. If I’m making a lot of challenges that serve the same basic purpose, I’m going to notice really quickly, because I’ll be writing the same thing. There are probably thousands different ways the challenge “player fights shooter enemies with moderate cover” could look in-game, but they’ll all look the same on paper, which is a sign that you’re level design is too repetitive.
Here’s a level outline I did for the third stage of Venusian Vengeance (You can play the level in question here)


First of all, I listed all the content that would show up in the level (Note that a few of these changed as the game developed. I took out switches, and the bombers became the barrel throwing enemies, which ended up getting introduced earlier in the game. Another good thing about designing on paper is it keeps things fluid and easy to iterate on). This would give me an idea of what I had to work with when designing the level, as well as what new content I would have to introduce over the course of the level.

Next step was outlining the actual challenges. I drew a sketch for each challenge and one some of them wrote a small note. Let’s go through them one by one:

Here I introduce boxes (although, as it wound up, I ended up introducing them slightly earlier at the end of the previous level). Short boxes serve to block movement but not projectiles (you can shoot over them), while tall boxes block both movement and projectiles, but can also be destroyed. Objects like these had been introduced before, as acid-pools had blocked movements but not projectiles, and rock pillars had blocked projectiles and been destructable, but this gives the player a chance to notice “okay, the tall boxes work like the pillars, and the short boxes work like the pools”. This also gives me a chance to establish how this level will be constructed differently than the previous level. Areas are more boxy and angular, and the short boxes are arranged in straight lines as opposed to the oblong blobs of the acid pools. You are fighting enemies you’ve already met, but you’re fighting them in a new environment.

Here I introduce conveyer belts. First you see a conveyer belt on it’s own. It’s placed across the room so that you have to walk over it and feel it move your character. In the actual game, I also put some enemies in this room so that you could see that they are also moved by the conveyor belt. After I introduce the conveyor belt on its own, I have another conveyor belt that has a hatch on one side which spawns tall blocks. This introduces another mechanic of the level, and shows that tall-blocks can also be moved by the conveyor belt.

Now that I’ve introduced the conveyor belts, I have a small set-piece that uses them in a different way. There’s a loop of conveyor belts with tall-blocks moving around on them, and enemies. The player has to use the moving cover of the tall-blocks to their advantage.
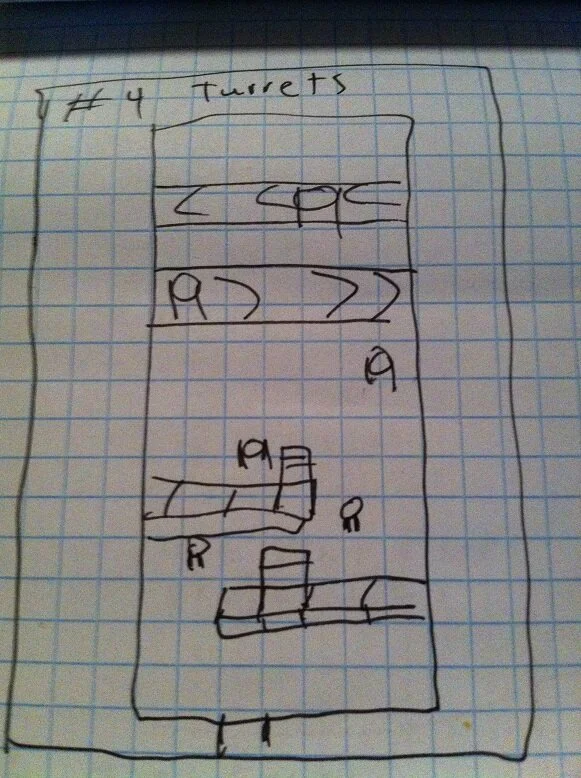
Next up I introduce turrets. These enemies shoot straight down. When they first show up, they’re pretty much trivial to deal with, since you can shoot them without entering their line of fire. This just serves to show the player how they work in a non-treatening environment. Next they’re combined with the conveyor belts, which allow them some level of movement, so they serve a bit more of a challenge.

Now I put it all together. There’s a room with a bunch of winding conveyor belts each with their own hatch which spawns tall-blocks, turrets, and explosive barrels, which all move along the conveyor belt. There are also standard shooter enemies running around in this area.
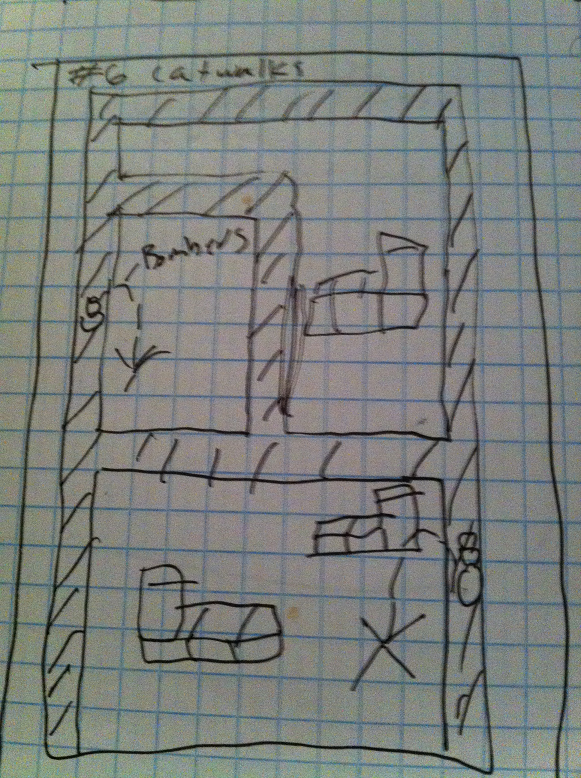
Finally, there’s an area with catwalks. Enemies up in the catwalks are throwing stuff down. This serves to introduce the idea of catwalks, which becomes the theme of the next level, where the player gets to go up into the catwalks. Not only does the player see the catwalks before being able to reach them, but they also are threatened by enemies up in the catwalks which they can’t attack from the ground, giving them motivation to reach higher ground.
So now you’ve got a basic plan. You have a series of challenges, and each serves some purpose in the overarching scheme of the game. Of course, you don’t have to stick to this plan 100%. As you noticed if you played the level as it showed up in the game, some things are different, some challenges have some extra enemies, and there are even a couple extra challenges that I decided would work well when I was actually designing the level. But having a general outline is helpful and keeps you from designing aimlessly, which can be a big source of uninspired level design.
So the next step is blocking out the level. In other words, you want to have all the functionality of the level, without any extra detail. For example, I would draw out the level with one ground tile, leaving the walls as just blank space. Then I’d put in all the enemies and objects. This lets you quickly get a playable version of your level working so you can actually try it out. You are still going to be changing things around a lot at this point to get the challenges just right, so you don’t want to expend time into adding polish when you might need to seriously rework an area at any moment. At this point you should be testing and editing your level constantly. You should also be getting your friends to test your level for you, as they’re going to provide a perspective closer to how the actual player would experience the game. You know your game inside and out, but your player won’t, so it’s good to get a third party to test out your levels to make sure you don’t make things too difficult, and make sure you don’t expect your player to already know something that you haven’t given them a chance to figure out yet.
Once that’s done, start adding whatever aesthetic touches you need. Walls, edges, details, whatever. And, again, play through your level again, this time also making sure everything actually looks good when in-game.
Next time, I’m going to talk about level structures past pure linearity.